
Improve email delivery by 1 point by enabling DKIM for your domain in Microsoft 365
- Osmany (Manny) Barrinat

- Nov 11, 2024
- 1 min read
Updated: Nov 26, 2024
This is a must for most organizations that are worried about email delivery. By default DKIM is off, and it needs to be turned on after DNS records are created, and the option is enabled in the Microsoft 365 Admin portal.
DKIM seals or signs outgoing emails with a digital signature. This signature can be authenticated using a matching public cryptographic key stored in a DNS record. DKIM is capable of signing various email headers and even sections of the message content, allowing to confirm that the email (or its signed sections) has not been modified while in transit.
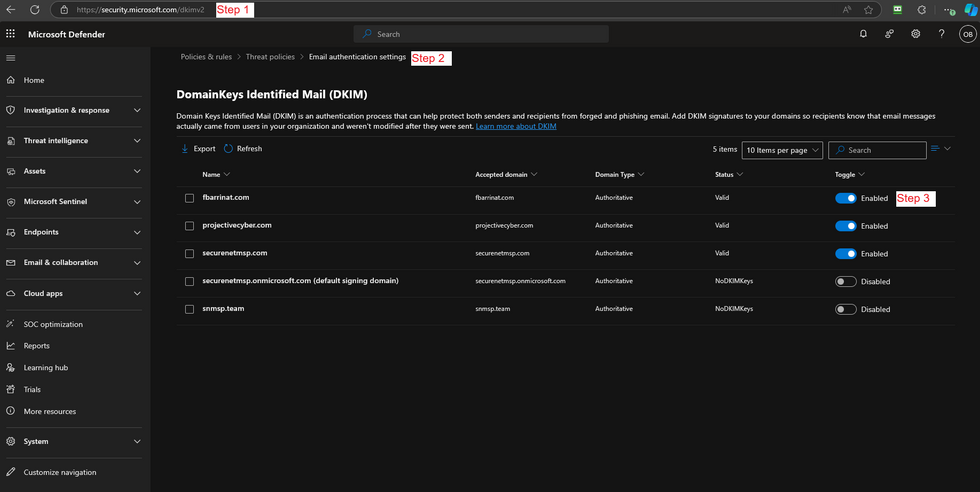
Go to your Microsoft 365 Admin Portal
Search for DKIM
Click on the Email Authentication settings (DomainKeys and Identified Mail DKIM) result
If your DNS settings are entered correctly, you'll have the option to Enable DKIM for your domain
After you enable DKIM wait a few seconds to confirm the Status changes to Valid.
Done
Your emails will now be sent with DKIM settings enabled.
Check out how I went from having a 8.5 score to 9.5 just by making this change.


Comments